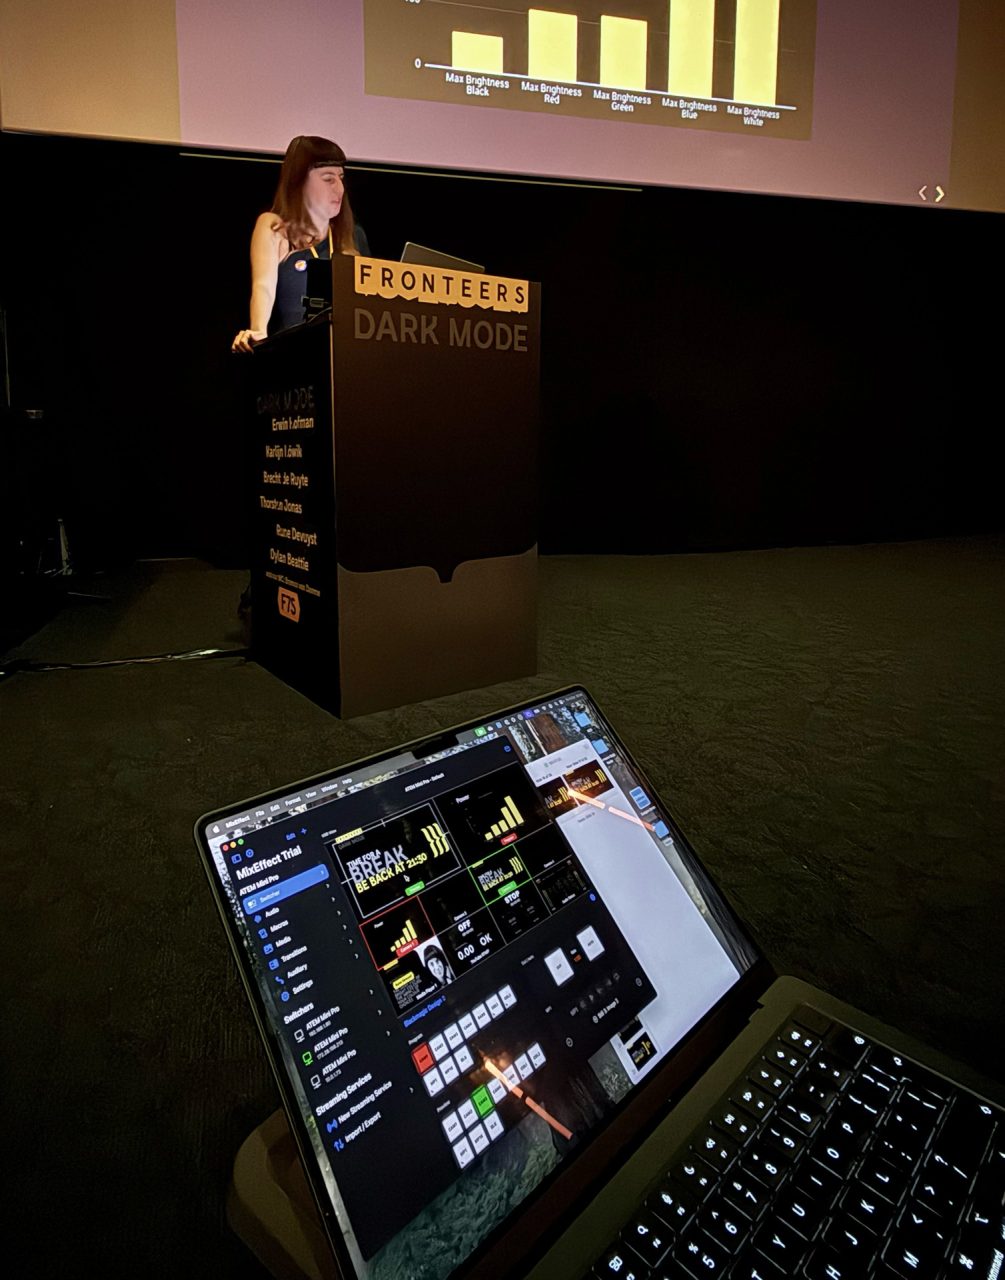
The Fronteers Conference made a comeback this year with a fresh concept, presenting unique technical challenges that we were excited to tackle.
Fronteers Dark Mode would be a smaller, more intimate event. We’d start around four in the afternoon and run until after midnight—an evening of frontend. We’d have dinner, drinks, and five excellent speakers. And it would cost only €50 for members and €100 for regular tickets. It would be a low-budget event – especially compared to previous editions – but it should not feel like one. We wanted the production to look professional. It should feel like a proper conference and not a meetup.
First of all, we had our own slides during the introduction of our MC. And we wanted to have title slides before and after each talk. And I really wanted a preview monitor for the speakers that would allow them to plug in their computers and set up their slides without the whole audience watching their every move.
I did not want speakers to plug their laptops directly into the big screen and then configure it. And then struggle to find the correct settings, while the audience reads the urgent e-mails that the speaker left open on the screen.
That would happen all off-screen and then, once they are ready to start, I would switch to their laptop, and they would begin their presentation. So we need a video mixer and multiple screens.
The venue – a small cinema – was great, but it did not have a professional video booth. We did not have a budget for that. We had no significant budget at all. The room only had one HDMI cable running from the lectern to the projector. Plug in a laptop and the video would appear on the screen and the audio would be picked up as well. That was it.
Fortunately, I already had some equipment at home. I have a Blackmagic ATEM Mini Pro video mixer, and at the office, I had a spare 10″ mini display that accepts 1080p video. Add an HDMI splitter, and that becomes the basis of an ingenious solution.
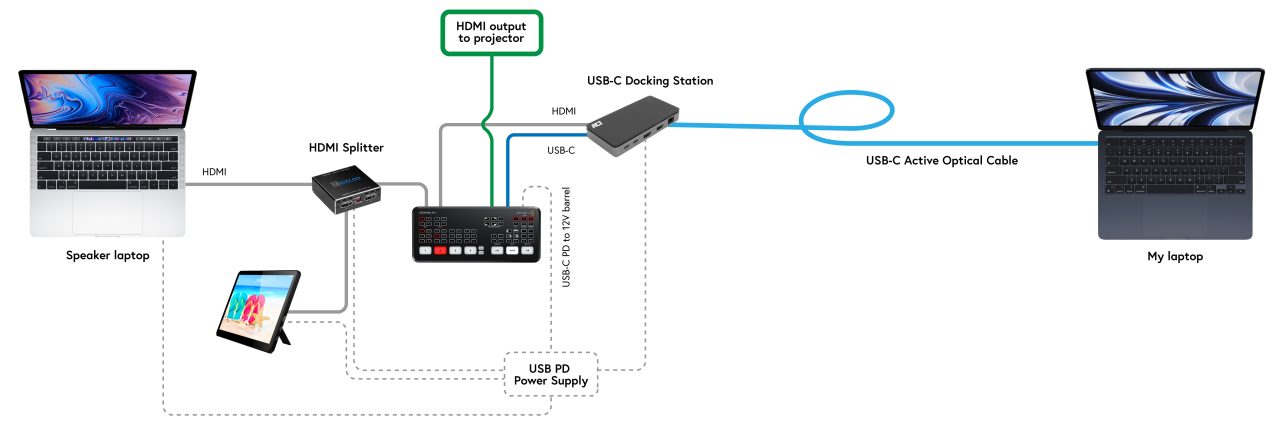
We would hide the video mixer in a box under the lectern, close to the speaker’s laptop and the HDMI cable that leads to the projector. The speaker would plug their computer into the video mixer using HDMI, and the mixer can be configured to output to HDMI, which we will connect to the projector. We then “only” need to add a second laptop as a video input for our own slides. And control the mixer remotely.
Controlling the ATEM remotely
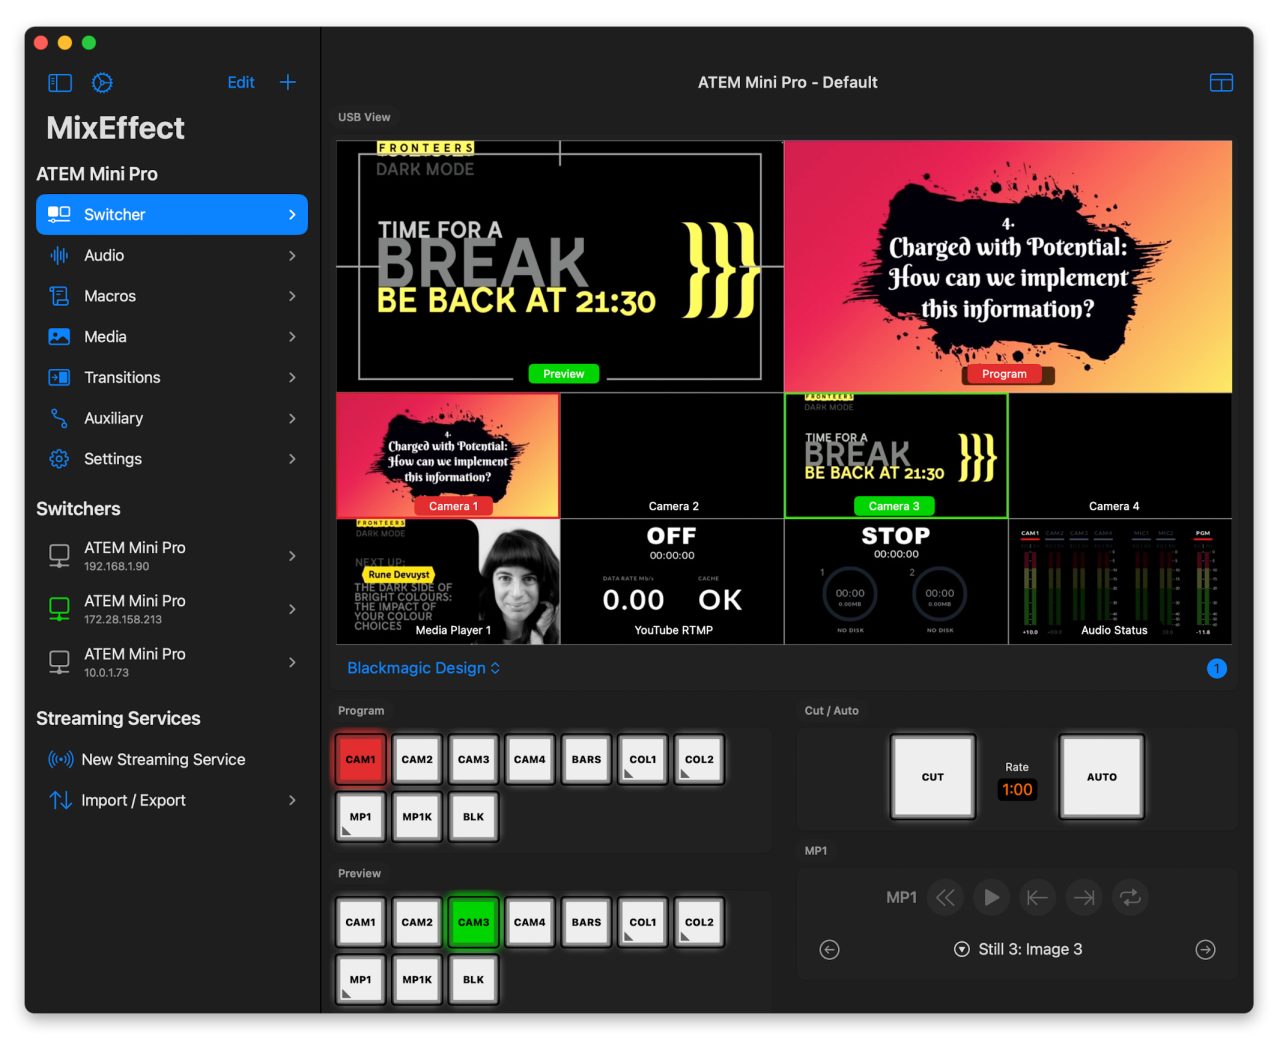
Controlling the ATEM Mini Pro remotely proved to be surprisingly straightforward. The ATEM has an Ethernet port for remote control. But by connecting the ATEM to my MacBook using a USB-C cable, it appeared as a network interface on my system. So no Ethernet cables were needed. This allowed me to easily manage the device using Blackmagic’s own software, or even better, using MixEffect.
But you are working in the dark. You can’t actually see your inputs and don’t know what they’re doing until you switch them to the big screen. The ATEM has a multi-feed view, but we’re already using the HDMI output port. Fortunately, the ATEM also has a second output as a USB webcam. We will send the multi-feed view to that output. On our MacBook, we can use MixEffect to display that right next to our controls. And with that we have a totally remote-controlled video mixer.
Not wireless – we do need to run a USB-C cable between our ATEM and our MacBook. And that can be a challenge as well. I was sitting in the first row, and I could have used a regular, long USB-C cable, but the longer the cable, the more potential issues you are likely to encounter. The maximum recommended length for a USB-C cable is 4 meters, but this applies only to USB 2.0 connections. That maximum length is only a recommendation, and it would probably work fine at higher speeds. However, I decided to use a 7.5-meter optical USB-C cable. It still uses copper for power delivery, but utilises fibre to transmit data, and it is fully compatible with USB 3.2 transfer speeds of up to 10 Gbit per second. We’re going to utilise that bandwidth, as we’ll be using the USB-C cable to send video from the MacBook to the ATEM as well.
Showing our own slides using the same USB cable
Since we have our own slides as well, and I don’t want to hide another computer under the lectern, I would like to use the laptop I’m currently using to control the video mixer, as well as to control our slides. So one computer to control everything. My laptop needs to be connected to the ATEM’s video input in some way so I can extend my desktop and run Keynote on the second screen.
And I don’t want to run a second cable from the HDMI output of my computer to the ATEM. We can also use the USB-C cable to carry our video to the ATEM. Instead of directly connecting the USB-C cable to the ATEM, we connect it to a small USB-C Docking Station. Essentially, my MacBook now features remote USB and HDMI outputs, which I can connect to the ATEM.
Another advantage is that I could also power my laptop by connecting a USB-PD power supply to the Docking Station. In fact, I powered all the devices using a single 6-port 250W USB power supply, so I would only need to use one power cord for everything, including powering the speaker’s laptop. All the devices supported USB-C power, including an HDMI splitter; however, I had to use a USB-A to USB-C cable for that, as it was not PD compatible. And for the ATEM itself, it does not support USB-C power, so I used a USB-C PD to 12V barrel cable instead.
So that one cable now provides power to my MacBook. Sends the multi-feed view to the MacBook as a webcam. Provides a network connection to control the ATEM. And sends HDMI video to the ATEM.
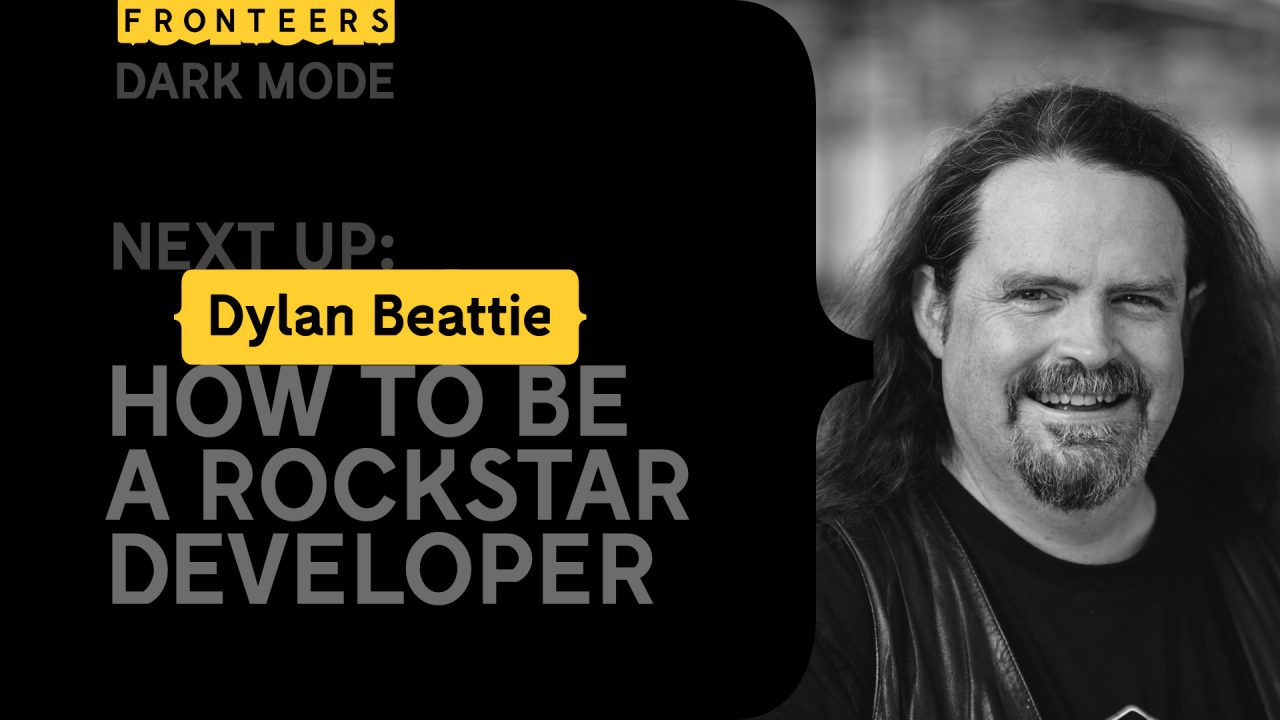
The setup allowed for seamless transitions between our slides and the speakers’ computers. While the speaker was delivering their talk, I could prepare our next slide in Keynote and even make real-time changes if necessary. Then, as the speaker concluded, I could smoothly switch to our slide introducing the next speaker.
Adding a preview monitor for the speakers
Now, the final part to make the setup for the next speaker seamless. Nobody wants to see a speaker mess around with screen mirroring on the big screen.
To prevent this, I added an HDMI splitter between the laptop and the video mixer that sends a copy of the output of the laptop to a small screen on the lectern. That allows the speaker to set up their machine without the whole audience reading their e-mails and seeing their notifications. The speaker gets a preview of what the audience will see once we switch over. And once the speaker is ready to begin, we smoothly switch over to their slides.
Perfect!
The equipment that I ended up using
Now, all in all, I ended up using a whole lot of gear. And some of it wasn’t cheap. But I already had everything except for the USB-C Active Optical Cable and the HDMI splitter. The rest was “free”.
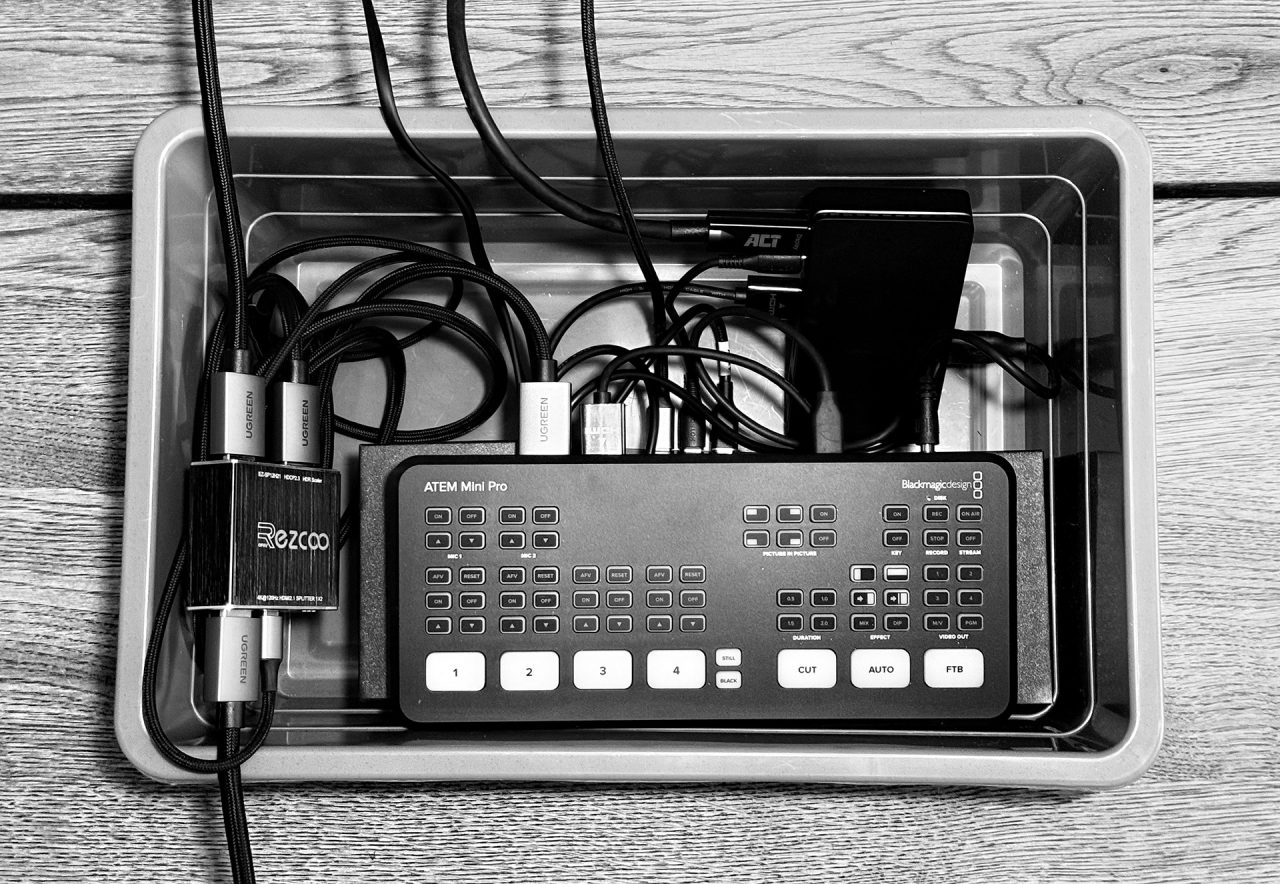
I had already set everything up at home and placed it fully connected in an IKEA storage box, so all I had to do was connect it to power and run some cables to the top of the lectern.
So what did I use:
- Blackmagic ATEM Mini Pro
- ACT USB-C Docking Station
- ACT USB-C Active Optical Cable (7,5 meter)
- Ezcoo HDMI 2.1 Splitter
- Magedok 10.8″ Portable 1080p Monitor
- Anker Prime Charger (250W)
- And a whole bunch of USB and HDMI cables
The exact components do not matter that much. Do you need that exact HDMI splitter? No. However, be sure to have a powered splitter; otherwise, it will not work reliably. Do you need an optical USB-C cable? You may be able to get away with a standard 5-meter USB-C cable. Any display will do, as long as it accepts 1080p. It is fine if it uses a lower resolution internally and scales down the image. As long as it accepts 1080p, you are good to go.
Was this level of production critical? Well, no. It would have worked without this whole setup; it did not improve the talks in any way. However, as a speaker myself, I know that having the technical side of things work seamlessly puts your mind at ease and allows you to focus on your talk. It also greatly enhances the overall feel of the event. Fronteers Dark Mode was definitely not a meetup++. It was a conference. And a very nice one at that.