I bought an Apple Studio Display. But unlike most people, I intend to use it for my Windows machine, which does not make much sense but hear me out.
I run Mac and Windows because I develop software for both Mac and Windows and am currently using an ageing iMac Pro and a pretty good HP Elitedesk Mini connected to an awful Samsung M7 display. The only thing okay about that monitor is its size and resolution: 4K at 32 inches, but otherwise, it is terrible.
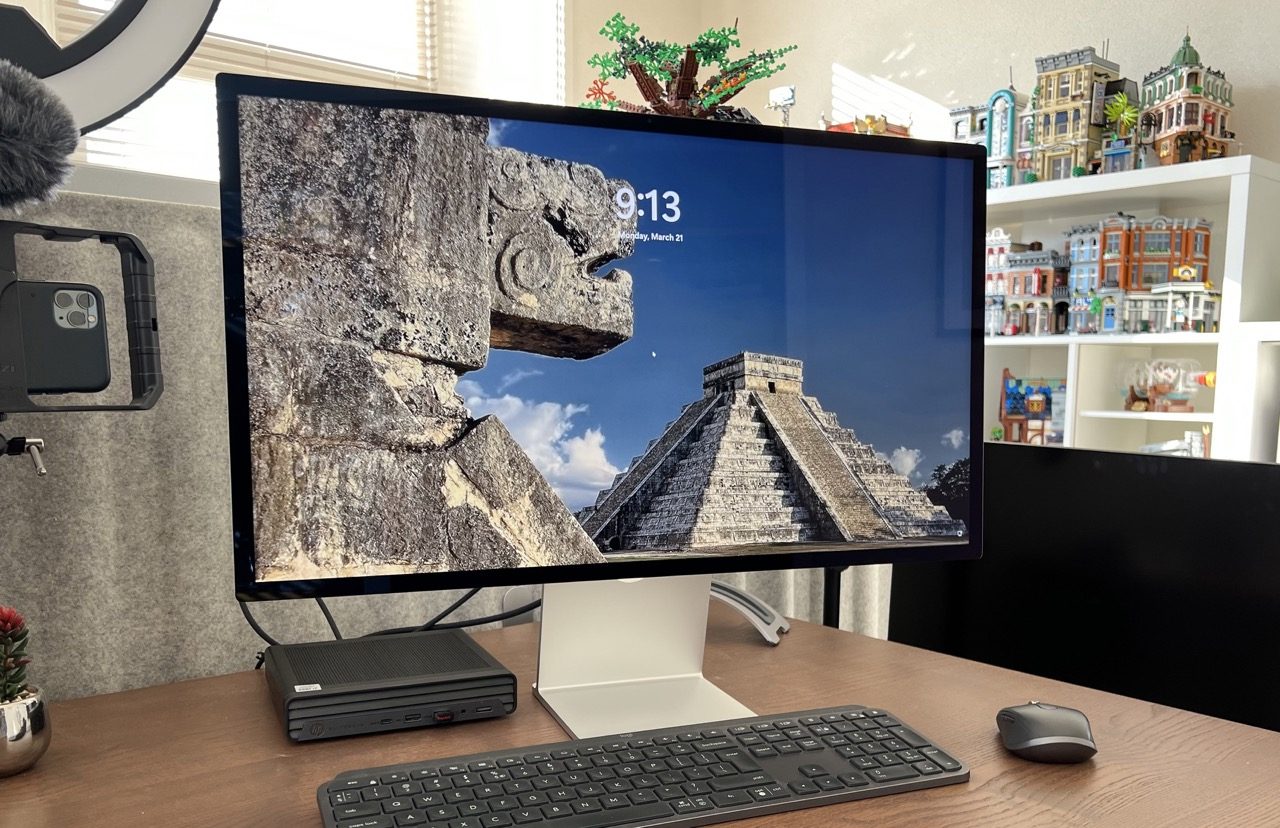
Once the Mac Studio becomes available again, I intend to buy one to replace my iMac Pro. But I had the opportunity to order one for pickup on day 1 of the Studio Display launch date. So I did. I figured I could use it for my upcoming Mac Studio, but in the meantime, it would be an excellent replacement for that terrible Samsung display. And now that I tried it, I think I might need to buy another Studio Display for the Mac Studio. I am now spoilt, and there is no way to return to that awful Samsung display.
Connecting the display to your Windows machine
First of all, we need to look at connecting the Studio Display to a Windows machine. Unlike most monitors, the connection options are pretty limited. There is no DisplayPort or HDMI port.
Thunderbolt 3
The only input the display supports is a Thunderbolt 3 port, which uses a USB-C style connector. And that is fine for connecting it to a Mac because they all have Thunderbolt ports. But it is not that common on Windows machines.
So if your Windows machine has Thunderbolt 3, you might be in luck, and it might work right out of the box.
But that is not a given. The graphics card needs to be hooked up in a way that the GPU can provide the Thunderbolt controller with a DisplayPort signal, which the Thunderbolt port then sends on to the monitor. Sometimes this involves manually connecting the DisplayPort output port of your graphics card with a cable to a DisplayPort input port on the motherboard.
USB-C
But there is an alternative. When Apple announced the display, I noticed that it also supported specific older iPad Pros. And those did not have a Thunderbolt controller. They supported USB-C instead, and more specifically, DisplayPort Alt Mode over USB-C. So that can only mean the Studio Display also supports USB-C input.
But once again, this does not mean that any simple USB-C port will work. It must support DisplayPort Alt Mode. And for that, the graphics cards need to be hooked up so that it provides the DisplayPort signal to the USB-C controller. So your miles may vary.
My HP EliteDesk has an internal Intel GPU and provides two external DisplayPort ports, but luckily it also has one USB-C port with DisplayPort Alt Mode. So the internal GPU is already wired up to redirect that DisplayPort signal to the USB-C port. So all I had to do was plug in the Studio Display in that specific port, and it worked. The other USB-C port on my machine didn’t have that internal connection to the GPU, so it did not work.
USB + DisplayPort + Adapter
There is an alternative that might also work. The Wacom Link2 adapter connects to your PC using USB-A and DisplayPort. And it connects to your display using USB-C. It basically combines the separate USB and DisplayPort signals into DisplayPort Alt Mode over USB-C. I haven’t tried it myself, but apparently, it also worked for connecting the Apple Pro Display XDR to a Windows machine. What does not work is the simple USB-C to Displayport adapters. Those only work one way, which is from USB-C to DisplayPort, so the wrong way for our purposes.
How does it work?
Even though Apple does not support using the Studio Display with Windows, pretty much everything works once you have it connected. But there are some issues and you may need to use some workarounds.
Sound
The first thing I noticed was the sound of the Windows startup chime thundering through my office. The speakers on this thing are just excellent. The microphone also works fine. They just show up in Windows as audio input and output devices and you do not need any drivers at all.
Webcam
The webcam also works out of the box, but the Center Stage functionality is disabled. I’m not sure why, as the Studio Display runs a copy of iOS and an A13 processor, it definitely packs enough punch to do the image processing on the monitor itself. But apparently, it is only supported when connected to macOS, which makes me think Center Stage is running on the Mac instead.
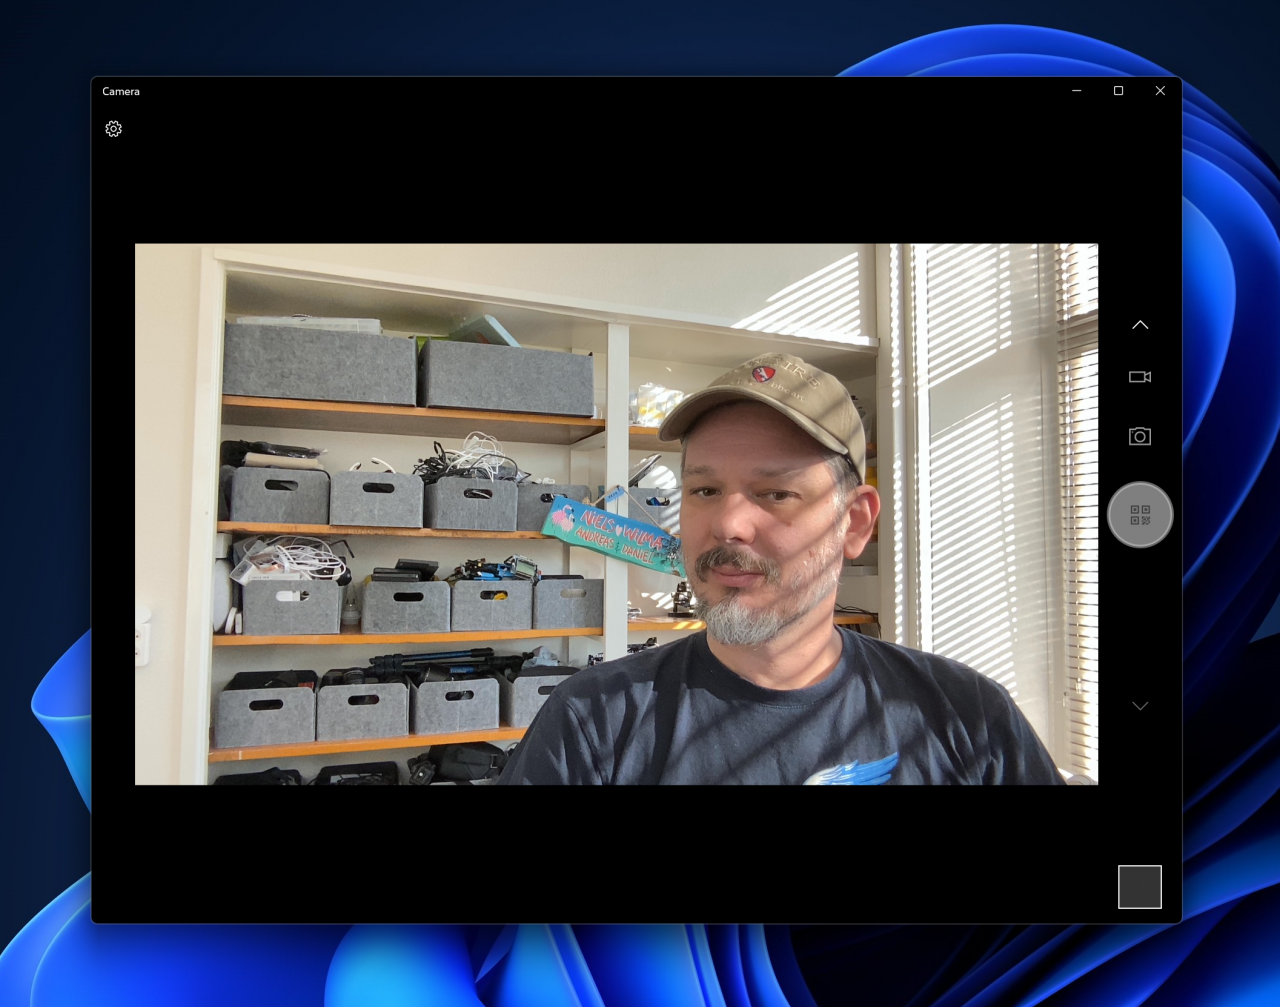
Anyway, the webcam just works. Some reviews mention that the quality is pretty bad but should become better once Apple releases a patch to the display firmware. And I’d have to agree. The image is certainly not great and grainy during low-light conditions, but with enough light, it was not that bad. Not really good either, but workable. I did not need to install any drivers; the Studio Display just appeared as a webcam with a 2.1MP 16:9 output. The exact image size was 1920×1080.
Brightness
The first problem you’ll probably run into is the brightness. By default, the display is set to full brightness, and when you try to use it in a dimmed room, you almost need sunglasses, so bright is it. And there are no physical controls to change the brightness. You can connect it to a Mac and change the brightness. It should remember your settings when you connect back to your Windows machine. Not great.
There is a way to control the brightness from Windows, but setting it up involves an Intel Mac. What you need to do is install Boot Camp for Windows. Boot Camp is a set of Windows drivers that Apple provides if you want to run Windows on your Mac hardware. Why an Intel Mac? Apple does not support Boot Camp on the M1.
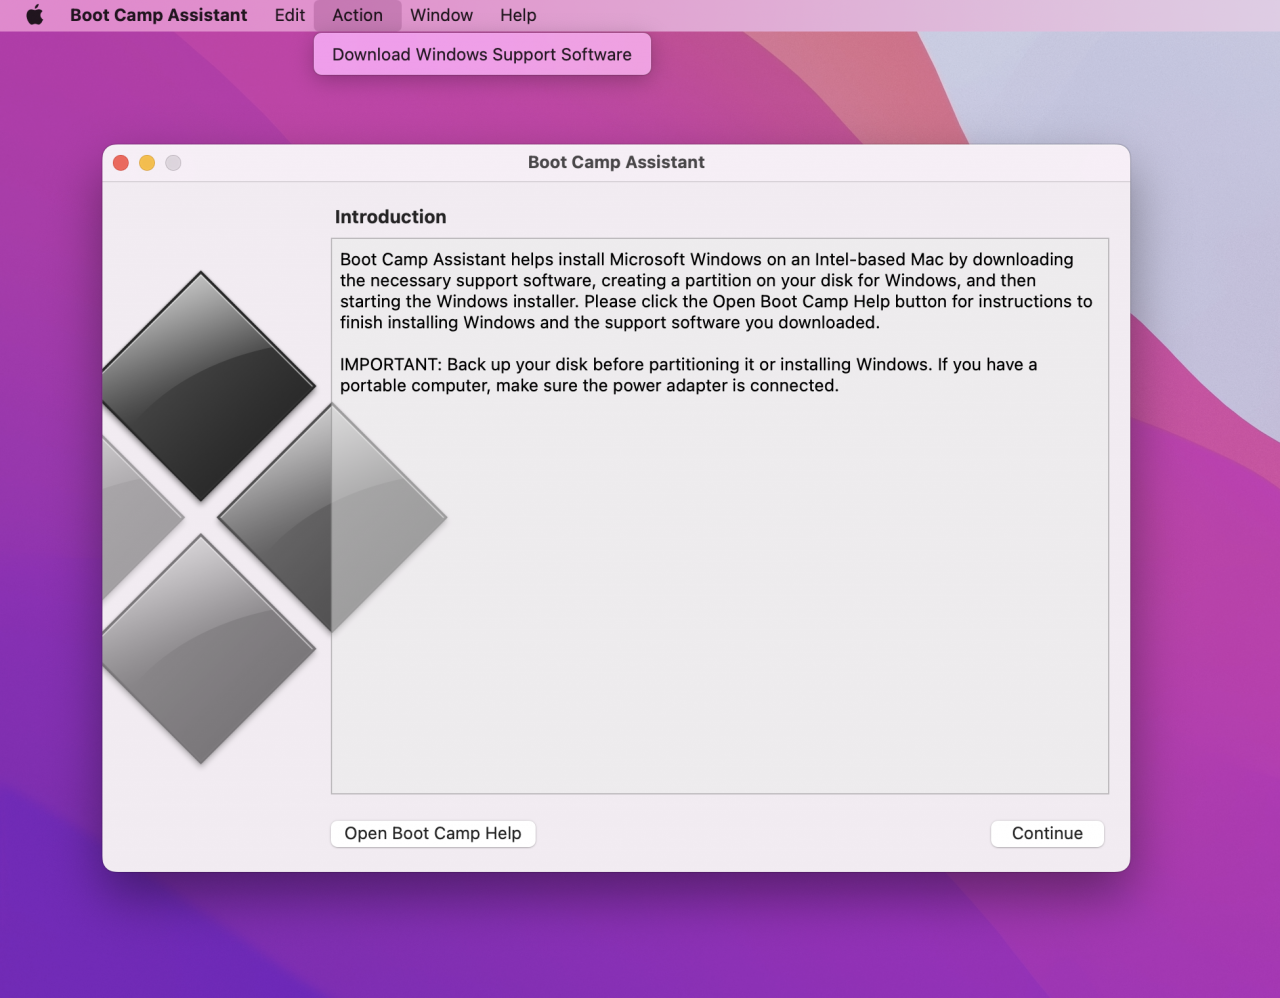
These are the steps you need to follow:
- Open Boot Camp Assistant on your Intel Mac.
- In the Action menu choose Download Windows Support Software and save it on a USB drive
- Plug the USB drive into your Windows machine
- Open a Terminal as an administrator
- Go to the
WindowsSupportfolder on your USB drive - Go to the
BootCamp\Drivers\Applefolder - Type in
msiexec /I BootCamp.msi - Wait for the installer to finish and reboot.
There is a regular installer too, but you should not use that. It will not work because the installer will check if you are trying to install it on an actual Mac running Windows. And we are not.
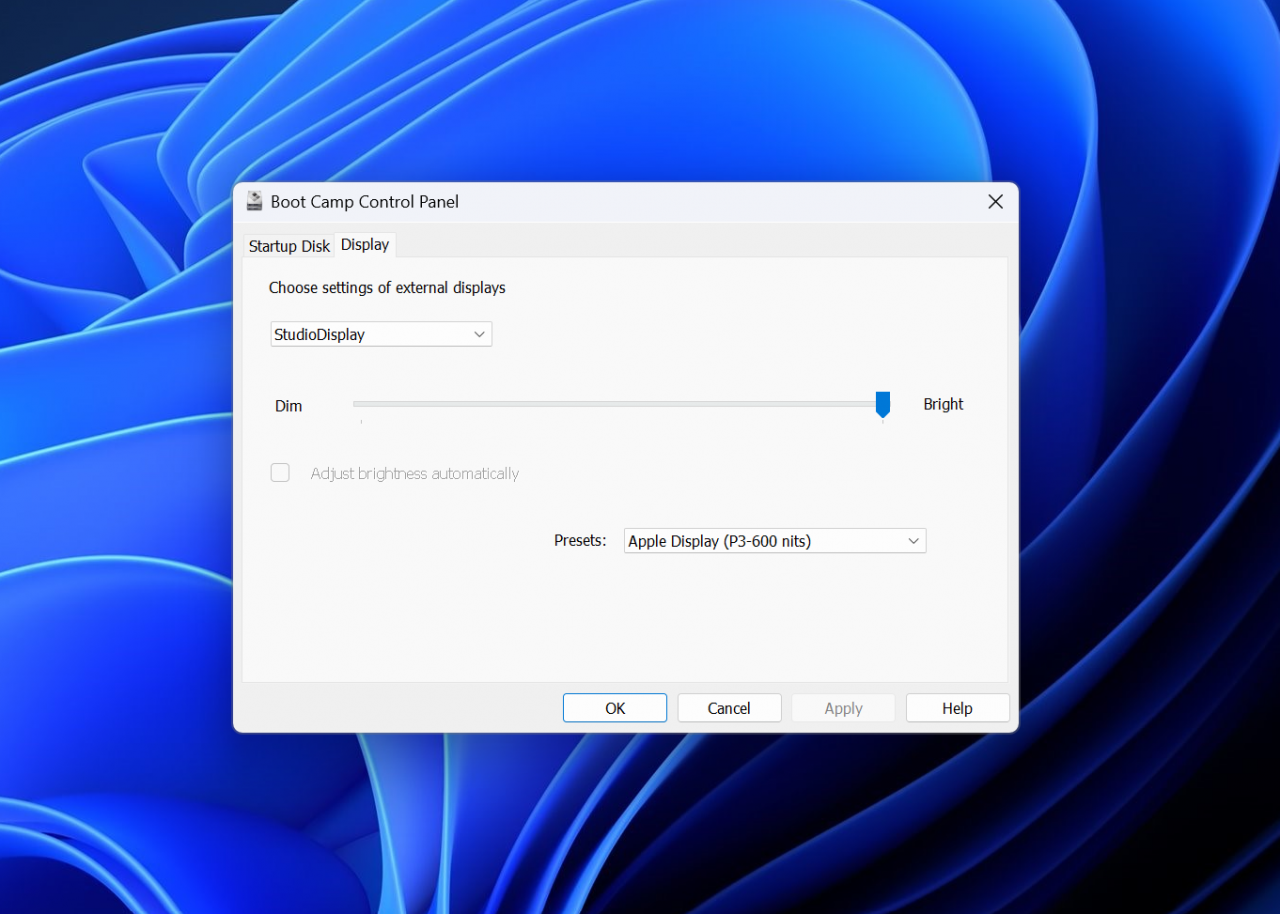
Once everything is installed, you should see a rotated square icon (◆) in your system tray. Click on it to open a menu and choose Boot Camp Control Panel... There should be a tab Display that has a brightness slider.
5K resolution
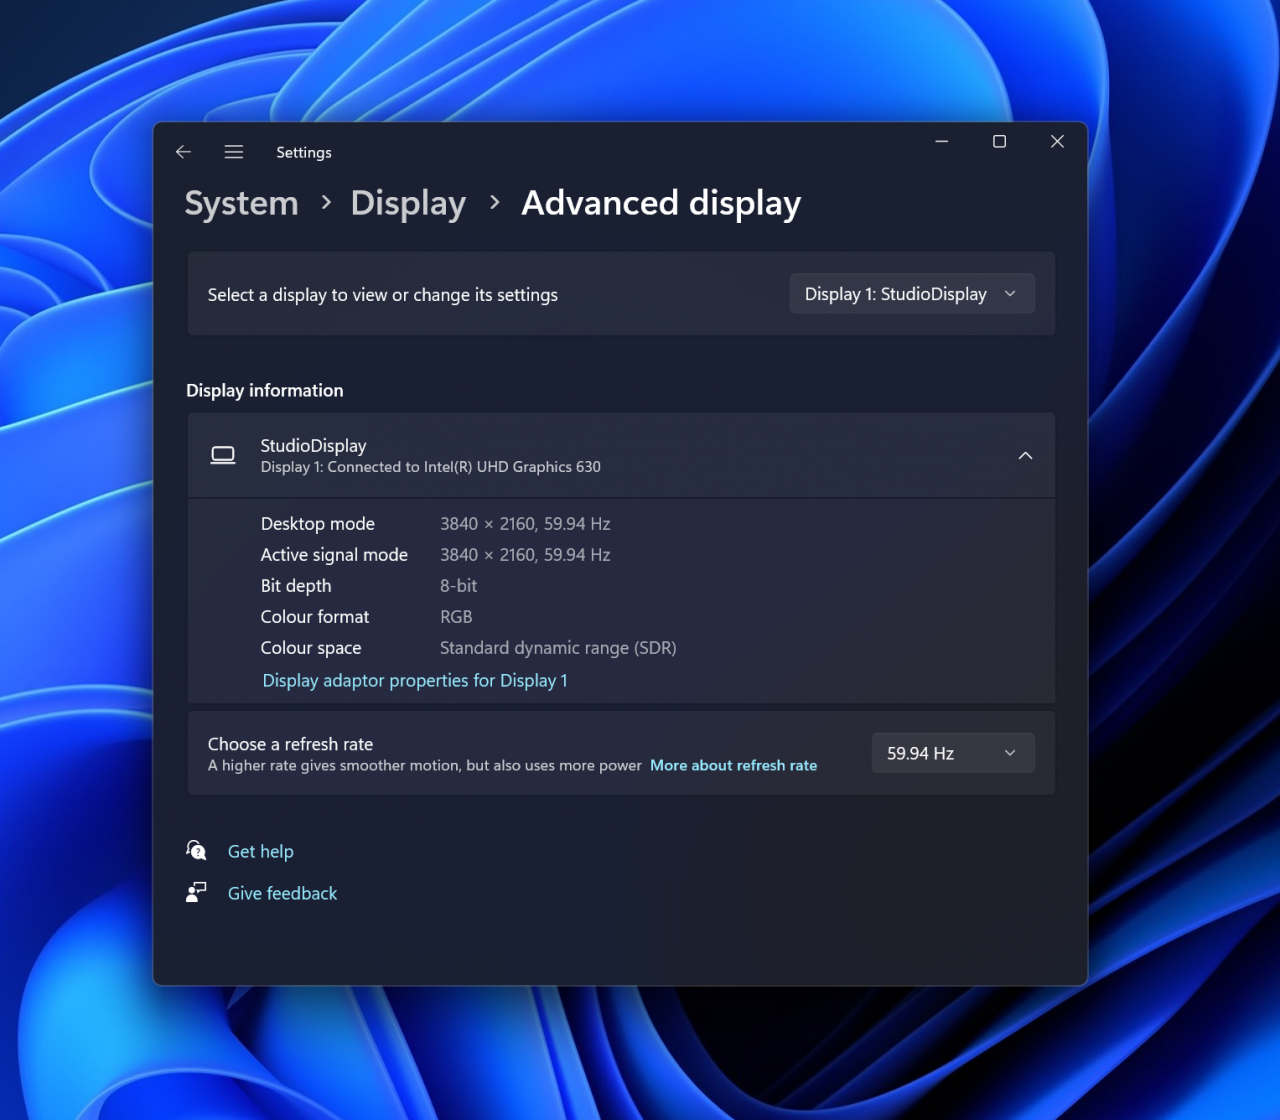
The image quality on my Studio Display is excellent, but it is not 5K. The internal graphics card is to blame. The Intel UHD Graphics 630 chip only supports a maximum resolution of 3840 x 2160 or 4K. In theory, DisplayPort Alt Mode should support 5K with simultaneous USB 2.0, but that depends on whether your graphics card can provide a 5K image.
Built-in hub
The Studio Display has three USB-C ports in the back for connecting other upstream USB devices. If you connect the display to your computer using Thunderbolt, they should be able to Support USB 3.1 Gen 2 with 10GB/s speed). If you use USB-C to connect the display with DisplayPort Alt Mode and use a 4K image, it will also support USB 3.1, but Gen 1 with 5GB/s speed. However, if you use 5K, it will fall back to just USB2 speeds.
But somehow, I failed to get the build-in USB hub working correctly. As I mentioned before, I am using USB-C with DisplayPort Alt Mode with a 4K image. So, in theory, the ports should be able to provide a USB 3.1 Gen 1 signal with a speed of 5GB/s. But in practice, only USB 2.0 devices work.
I plugged in a USB drive that should support USB 3.1 up to 10GB/s, which failed. I understand it would not support 10GB/s, but it should at least connect at 5GB/s speeds. In any case, it gets power but does not show up in the Device Manager as a USB Mass Storage Device. Next, I tried a Logitech BRIO 4K webcam which supports USB 3.1 up to 5GB/s, but it also failed to work.
I plugged in a USB 2.0 mouse, and it worked. So a maximum of USB 2.0 it is.
Firmware updates
They will not work on a Windows machine. You need to connect it to a Mac to upgrade to a newer firmware. Not an issue for me, as I have an iMac Pro right next to it, but it might be a problem for standalone Windows use.
TL;DR
Can I use an Apple Studio Display for my Windows machine? Yes, you can. But is it a good value for money when using it as a display for Windows? Nah, probably not. Should you buy one to use as a Windows display? No, you really should not.
There is no reason you should buy a Studio Display for your Windows machine unless you already happen to have one lying around unused. Fat chance. There are cheaper alternatives that use pretty much the same screen as the Studio Display and are supported under Windows. The LG UltraFine 5K springs to mind. It is €400 cheaper. Just buy that one.
That said, it looks great, and the image is fantastic. So, if you have too much money and want to have two identical monitors next to you on your desktop for some aesthetic reason, go for it.